Do you have any denim pockets that have been
waiting for a unique project? This may be it!
Why not try this quick and easy project using two denim jean pockets that will nicely decorate a small space on the wall next
to your desk or work area or even bathroom.
 Ready-Pocket filled with Notepad and Pencils
Materials List:
·
2 pieces fabric* (front and back) – 13” x 13” (minimum)
·
1 piece batting – 13” x 13” (same size as fabric pieces)
·
Two denim pockets (cut from old jeans) – two
sizes
·
10” embroidery hoop
·
Thread – either contrasting or matching
*Fabric can be any color you choose. It may be made from one
piece or a pieced section cut to these dimensions. [IE: An orphaned block or
scrappy block from a variety of fabrics cut to 13” x 13”.]
Instructions:
Quilted Block—
1. Cut
fabric and batting – all pieces are: 13”
x 13” (minimum).
2. Before
layering, you may fold the top fabric to form a triangle and press to create a
fold line to form an X to mark the first lines of stitching.
3. Layer
these three pieces with right side of bottom piece facing down and right side
of top piece facing up, with the batting in the center.
 Layering Pieces
4. Fasten
the layers with three or four pins to hold them together as you sew the grid
lines.
5. Begin
stitching on the fold line and then continue stitching straight lines on both
sides of this center line. Stitching lines are set two inches apart in this
project.
 Creating the Grid Lines
6. Turn
block and repeat Step 4 to stitch on the other fold line and continue until you
have formed a grid.
7. Your
quilted block is now ready for adding the pockets.
 Grid Lines Completed
Adding Pockets—
8. Select
two denim pockets from old jeans. You will need two different sizes. Or if you
wish, you can add just one pocket.
9. If
your pockets have been cut with the leg material still attached, cut out around
the pocket. Then trim around the pocket carefully to get rid of any stray
threads.
10. Turn
the pocket over, and cut away the extra layer, as you’ll need to be able to
stitch on the second pocket without closing up the bottom pocket.
Trimming Pocket--Backs
11. Place
the smaller pocket on top of the larger pocket. Then stitch around the sides
and bottom of the smaller pocket to attach it to the larger pocket. Leave the
top unstitched.
12. Use
a thread color to match the denim fabric or other color of your choosing.
Stitch next to the outer edge of the decorative stitching line already on the
pocket.
13. Secure
the beginning and ending points of your stitching with backstitching or a
narrow zigzag. Carefully and slowly stitch over the bulky sections at the top
of the pockets.
14. Mark
the center point on the bottom edge of the block with a pin or your finger as
you place the pockets onto the quilted block.
15. Measure
two inches from bottom of quilted block and place bottom point of the pocket
there. It should be centered now from each side of pocket to outer edges of
quilted block.
Placement of Pockets
16. For
the larger pocket, sew two or three rows of stitching to secure it to the
quilted block. First, sew a row of stitching as in Step 12.
17. Then
another row of stitching inside the outer decorative stitching already on the pocket.
This can be done all in one round before cutting thread.
18. I’d
suggest stitching two lines around the sides and bottom of this pocket. [IE: between
the decorative lines, as shown below:]
 Stitching Lines for Larger Pocket
Inserting into Hoop—
19. Open
hoop and place bottom ring on table.
20. Center
quilted block on bottom ring and add top ring.
21. Retighten
hoop.
 Inserting Into Hoop
22. Then
trim fabric away from back of hoop to complete project.
 Trimming Away Excess Fabric
23. If
you wish, you may take it out again and serge or zigzag around the edge.
24. It
is ready to fill with items and hang on the wall. Enjoy.

Completed Ready-Pocket
Note: If desired, you
could add binding and a hanging sleeve to create a mini quilt you can hang from
a rod, instead of putting it into a hoop.
A Few Examples—Filling the Pockets:
 Pencils and Notepad
 Concert Tickets
 Toothpaste and Toothbrush
Discover other unique places where a Ready-Pocket might come in extra handy. Hope you enjoyed this tutorial.
.....


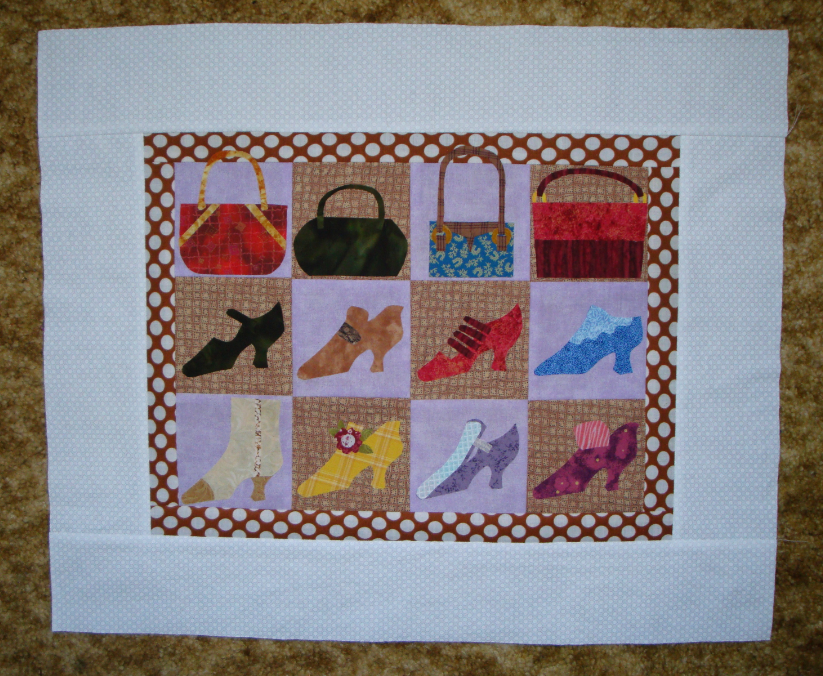
 The center section with the first border (polka dot fabric) is 15 3/8" wide x 12" high. Add the white border and it will be approximately 22" wide x 18 1/2" high.